Một số các services khi cài đặt bắt buộc bạn phải cài đặt Active Directory Domain, đặc biệt cài đặt hệ thống Mail Exchange Server.
Bài hướng dẫn cài đặt Active Directory Domain mình thực hiện trên Windows Server standard 2019.
Bước 1: Cài đặt địa chỉ IP tĩnh cho server trước khi thực hiện cài đặt
Hệ thống mạng của mình là dải IP 192.168.11.x, địa chỉ IP tĩnh cố định cho server là 192.168.11.200, các bước thực hiện theo tứ tự từ 1 tới 5 như hình sau:

Bước 2: Cài đặt Active Directory Domain services
Mở cửa sổ Server Manager theo thứ tự từ 1 đến 3 theo hình dưới
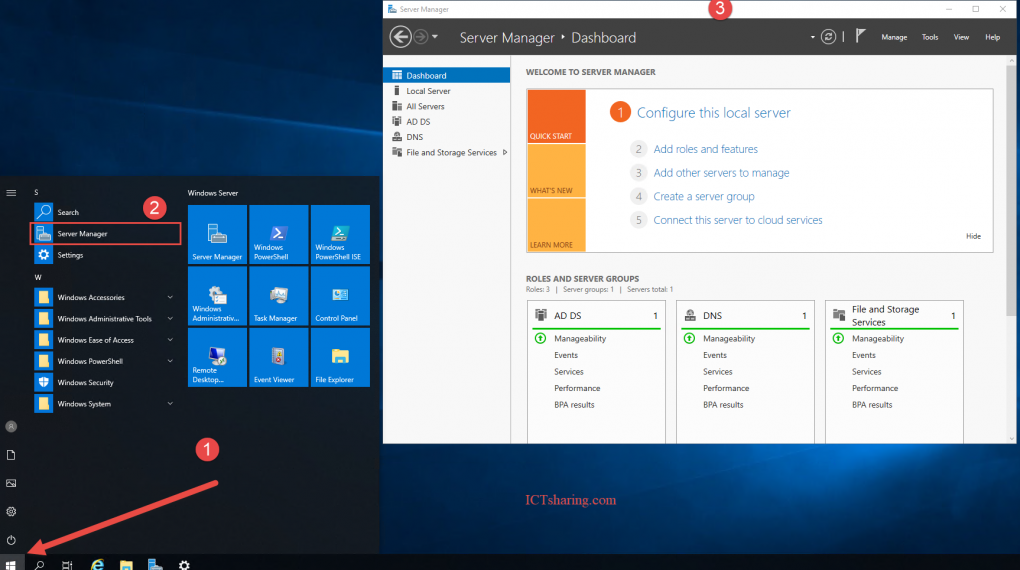
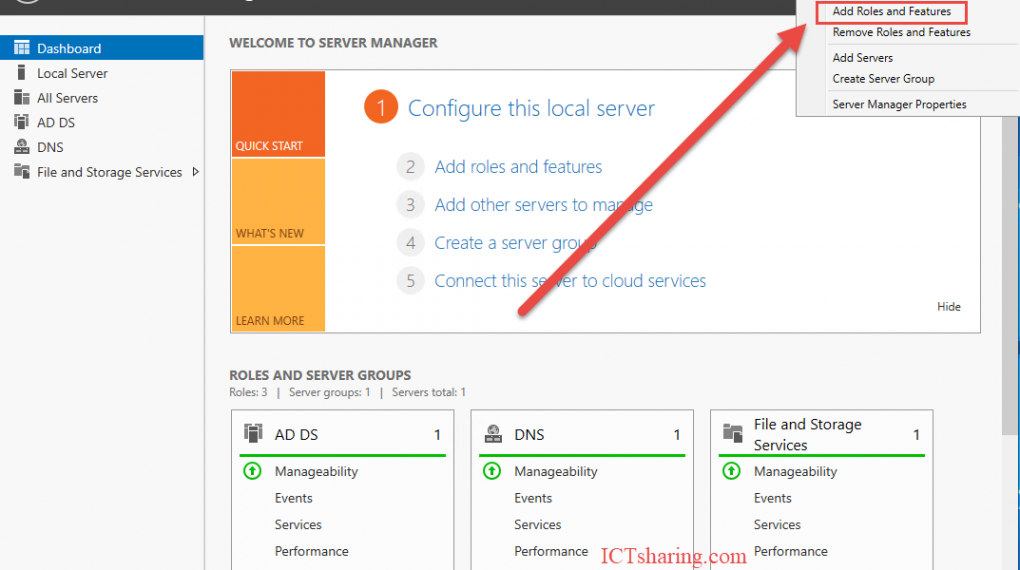
Chọn Add Roles and Features
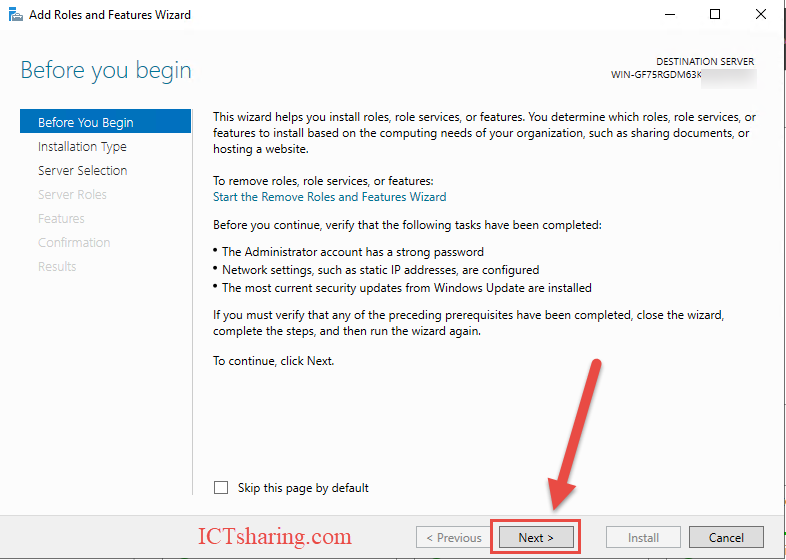
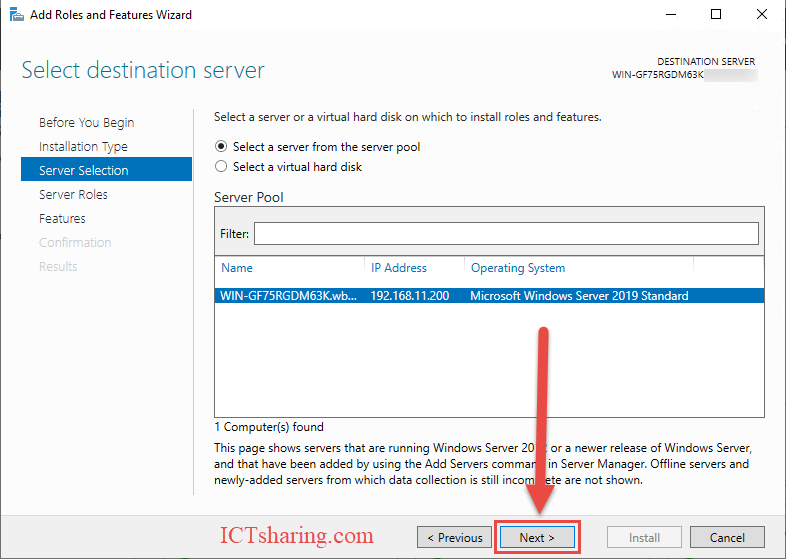
Chọn Next
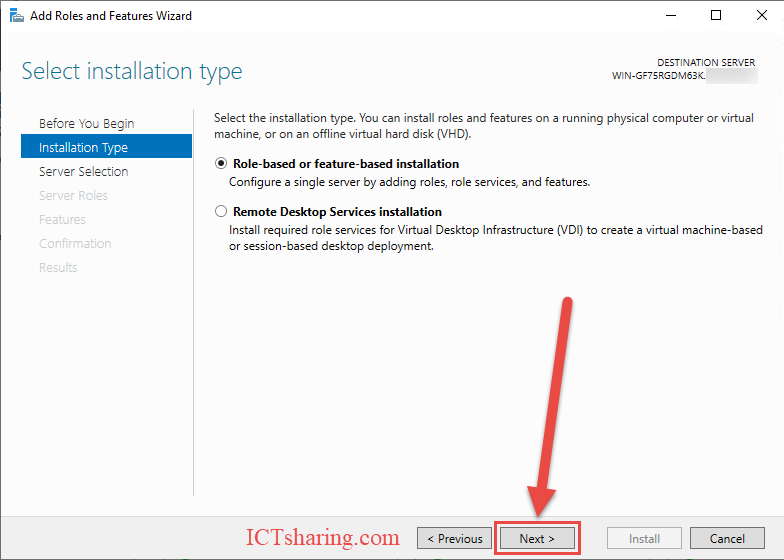
Chọn Next
Chọn Next
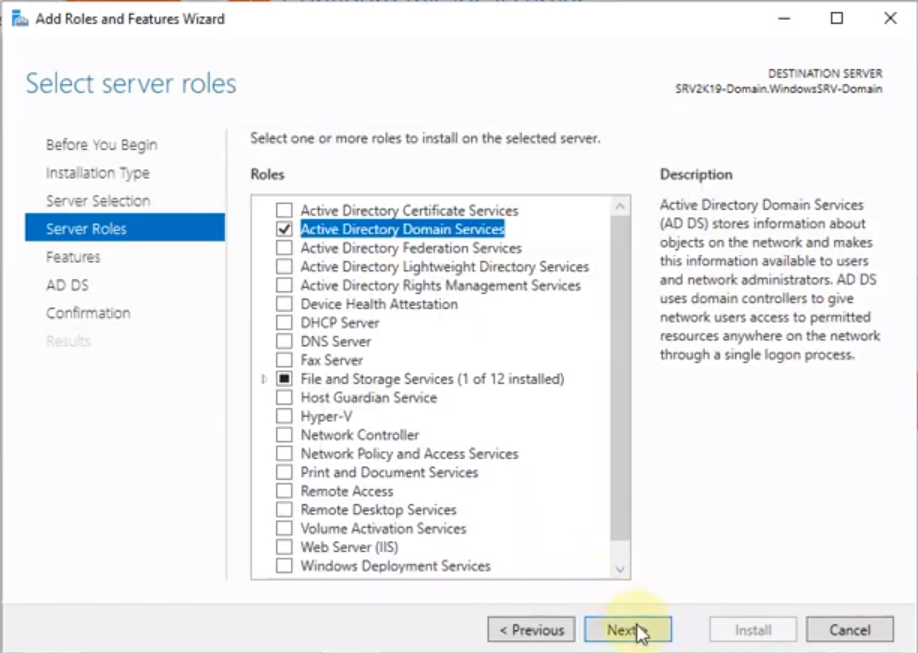
Tại cửa sổ Select Server Roles Chọn Active Directory Domain Services
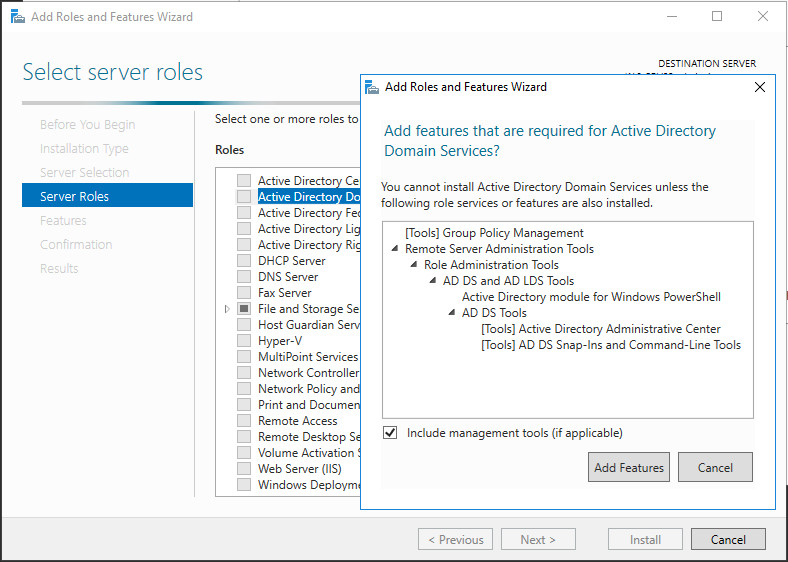
Trong hộp thoại Select server roles, chọn mục Active Directory Domain Services, chọn Add Features.
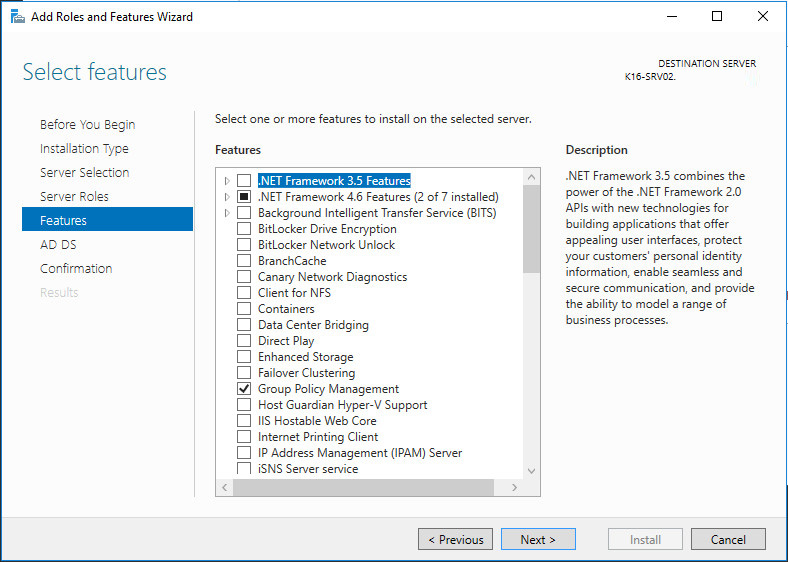
Trong hộp thoại Select features, chọn Next để tiếp tục.
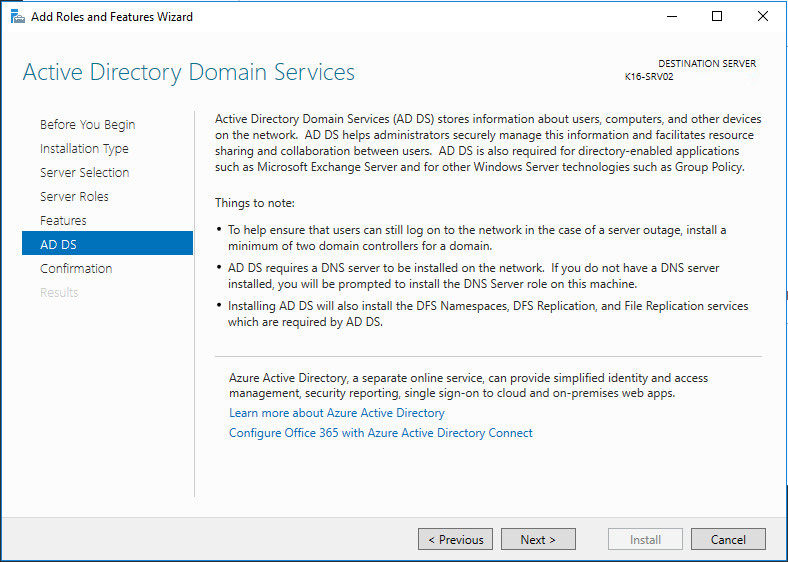
Tại cửa sổ Active Directory Domain Services, chọn Next
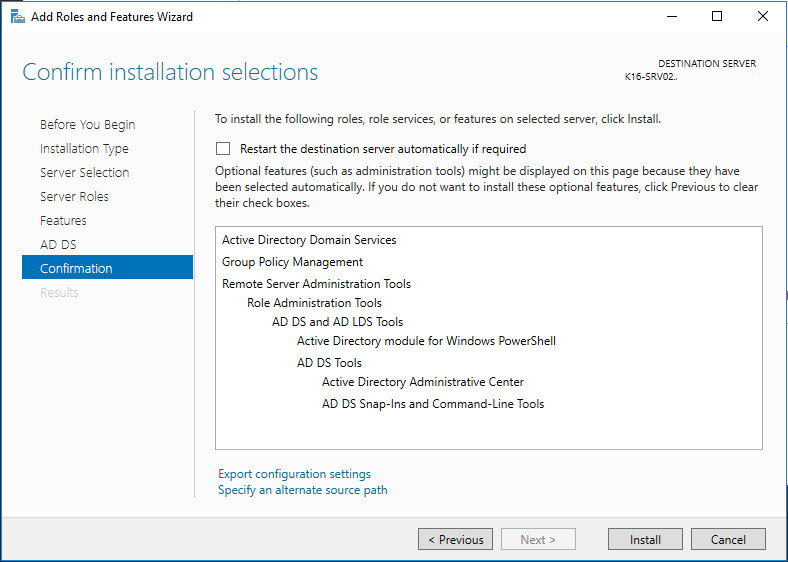
Tại Confirm installation selections, chọn Install.
Dịch vụ Active Directory Domain Services đang được cài đặt.
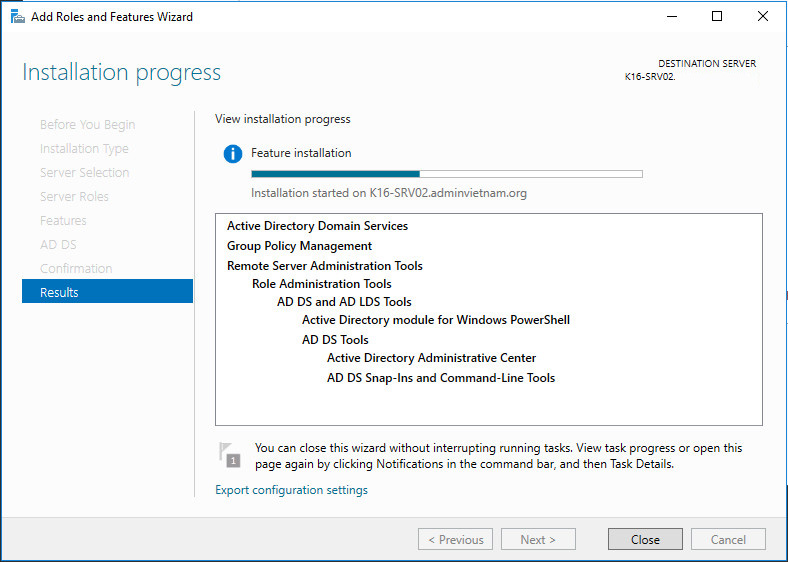
Chọn Close để hoàn tất quá trình cài đặt.
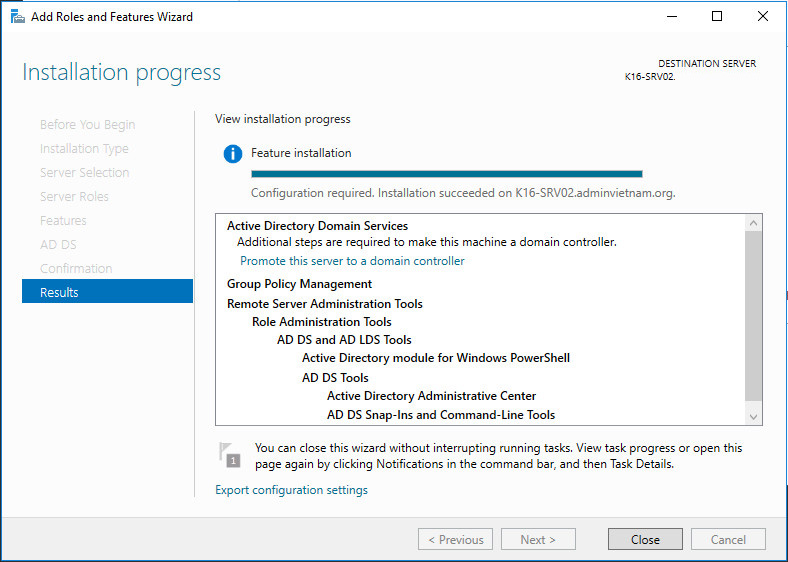
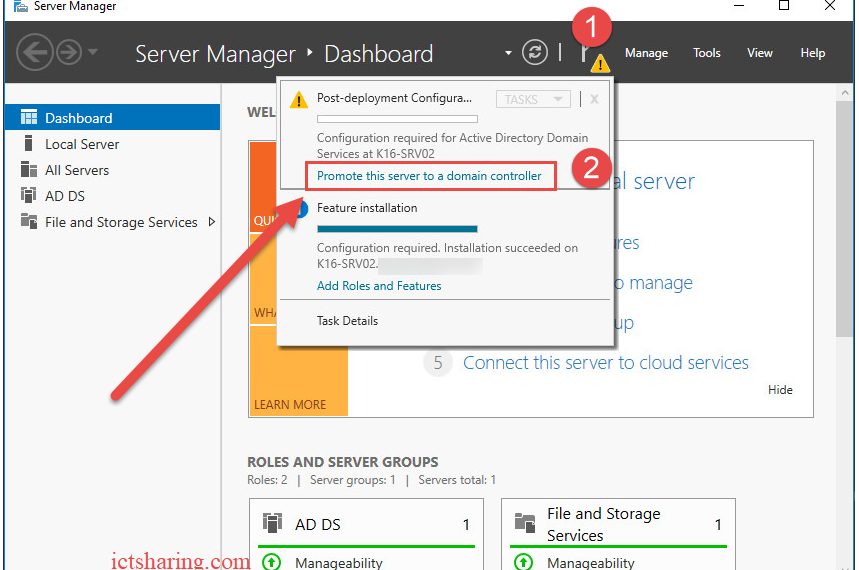
Tại cửa sổ Server Manager, chọn Promote this server to a domain controller.
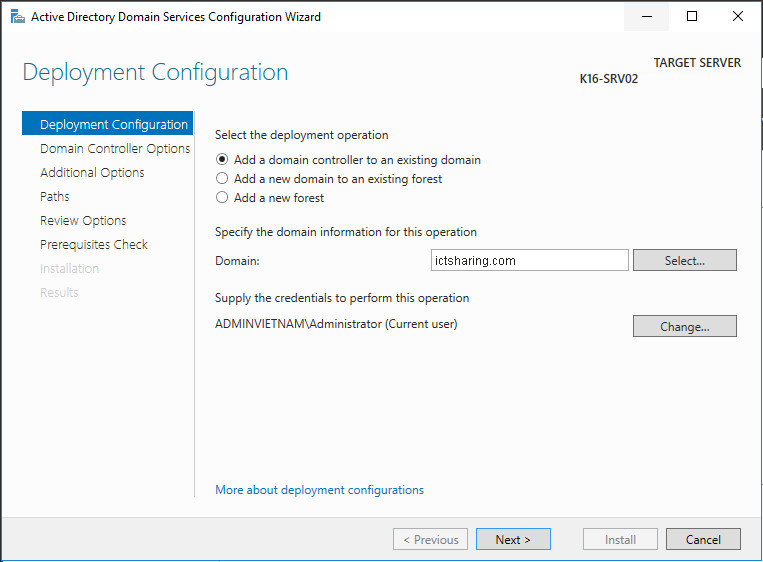
Trong hộp thoại Deployment Configuration, chọn Add a domain controller to an existing domain, chọn Next.
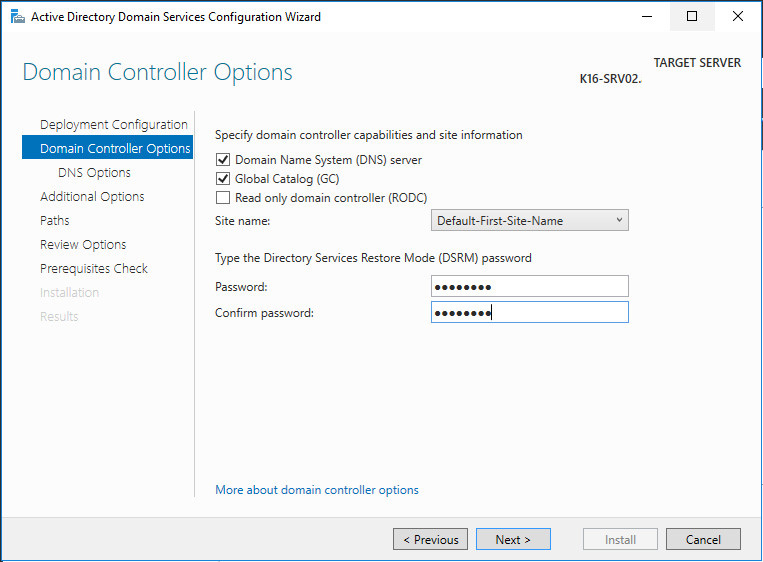
Trong hộp thoại Domain Controller Options, đặt mật khẩu khôi phục hệ thống Domain khi có sự cố, chọn Next.
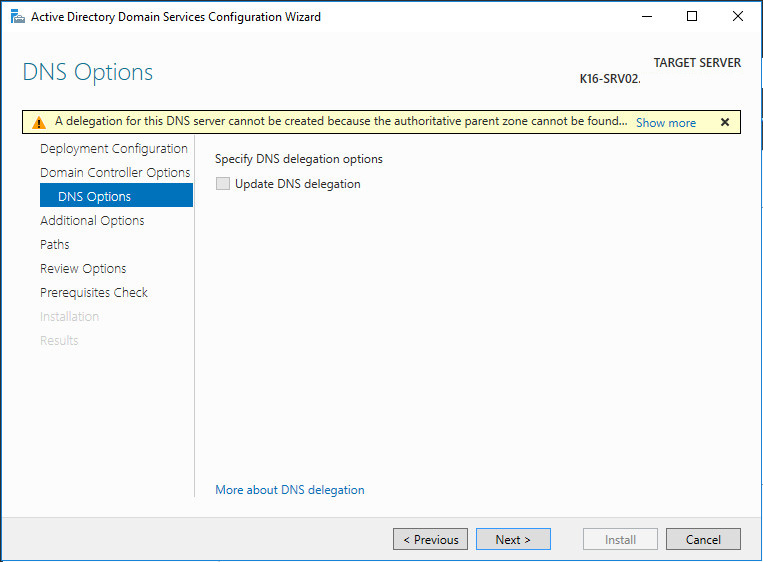
Trong hộp thoại DNS Options, chọn Next.
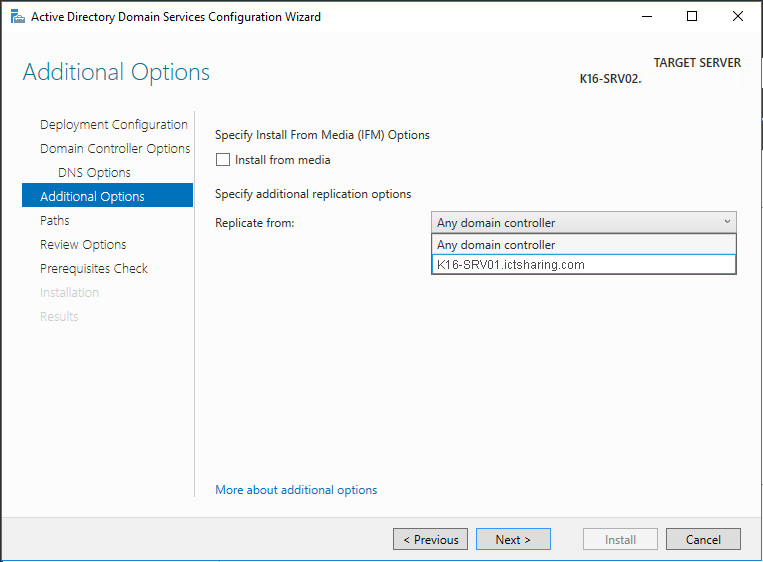
Trong hộp thoại Addtional Options, chọn Server 1 để đồng bộ dữ liệu.
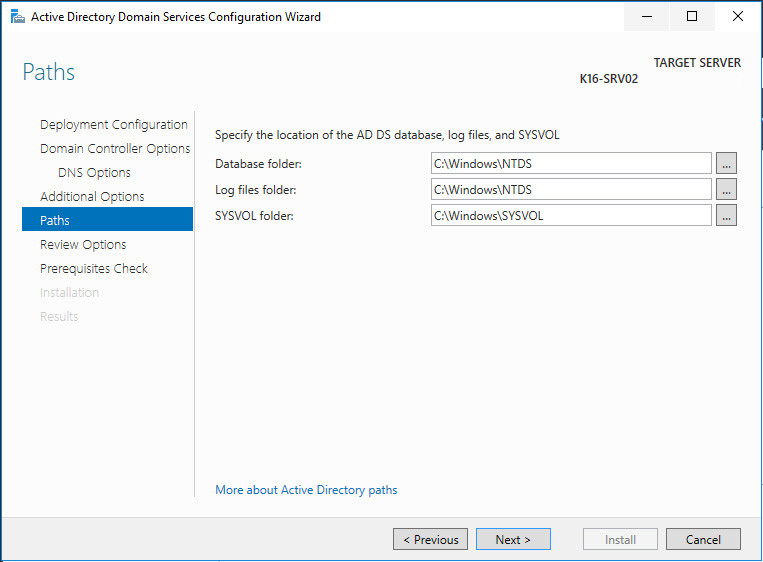
Trong hộp thoại Paths, chỉ định đường dẫn lưu trữ CSDL của hệ thống miền
Trong hộp thoại Review Options, chọn Next.
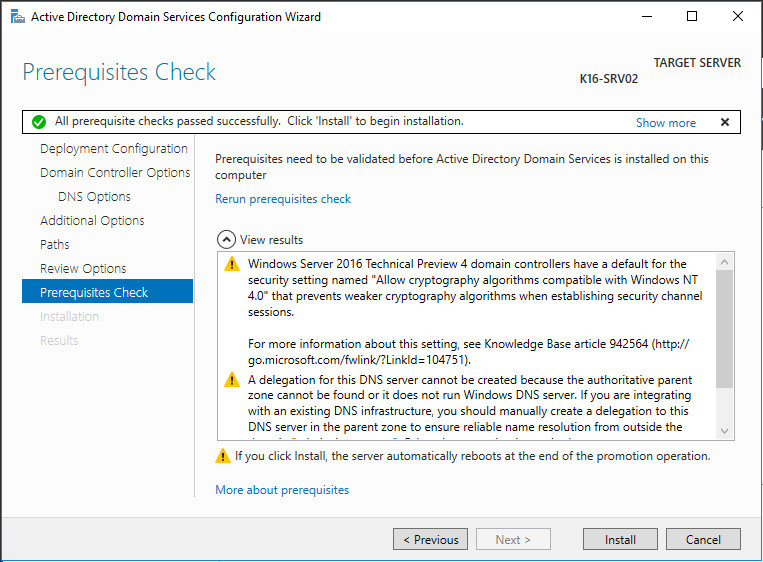
Trong hộp thoại Prerequisites Check, chọn Install
Sau khi cài đặt xong, khởi động lại server và tiến hành đăng nhập để xem kết quả.