Đối với các bạn làm blog chia sẻ dữ liệu, ngoại việc kiếm tiền google adsence trên các bài viết chia sẻ, việc tạo một trang chuyển hướng khi download rồi nhúng code quảng cáo vào sẽ làm tăng thêm thu nhập cho các bạn. Hôm nay ICTsharing giới thiệu cho các bạn cách tạo trang chuyển hướng này.
Tạo trang chuyển hướng link download
Bước 1: Tạo một trang trong thư mục theme đang sử dụng
Truy cập vào mã nguồn website wordpress của bạn: wp-content\themes\theme bạn đang sử dụng. Tạo một file page–redirect-link.php hoặc tạo ở máy tính rồi upload file này vào thư mục theme.

Mở file vừa tạo, copy đoạn code dưới dán và lưu file lại.
<?php
/*
Template Name: Chuyển hướng
*/

$redirect_to = !empty($_GET['url'])
? trim(strip_tags(stripslashes($_GET['url'])))
: '';

$wait_time = 30000; // thời gian tự động chuyển hướng (tính bằng millisecond - ở đây là 30000 ml = 30s).
$wait_seconds = $wait_time / 1000;

add_action('wp_head', 'redirect_to_no_index', 99);
function redirect_to_no_index()
{
?>
<!-- tắt index trang này -->
<meta name="robots" content="noindex, follow">
<?php
}

add_action('wp_head', 'redirect_to_external_link');

function redirect_to_external_link()
{
global $redirect_to, $wait_seconds, $wait_time;

if (empty($redirect_to) || empty($wait_time)) {
return;
}
?>

<script>var redirect = window.setTimeout(function(){window.location.href='<?php esc_html_e($redirect_to); ?>'},<?php echo $wait_time; ?>);</script>
<noscript><meta http-equiv="refresh" content="<?php echo $wait_seconds; ?>;url=<?php esc_attr_e($redirect_to); ?>">></noscript>
<?php } get_header(); ?>


<div class="redirect-page">
<div>
<?php if (!empty($redirect_to)) {
echo '<p style="font-size: 95%;margin: 8px !important; color: #fff;">Bạn muốn chuyển đến:</p>';
printf(__('<div style="margin: 8px !important;word-wrap: break-word;">%s</div>'),esc_html($redirect_to));
?>
<p><span class="redirect-timer" id="timer"></span></p>
<div style="margin-top:20px">
<button id="redirect-get" onclick="window.location.href='<?php esc_html_e($redirect_to); ?>';return false;"><?php _e('✓ CHUYỂN TỚI LUÔN'); ?></button>
<button id="redirect-close" onclick="self.close()"><?php _e('✘ Hủy bỏ'); ?></button> <br />
</div>

<?php
} else {
_e('Liên kết này bị lỗi hoặc không tồn tại!');
}
?>
</div>
</div>
<script>
document.getElementById('timer').innerHTML = <?php echo $wait_seconds;?>;
var timer = <?php echo $wait_seconds;?>;
var interval = setInterval(function() {
var seconds = timer;
if (seconds > 0) {
--seconds;
document.getElementById('timer').innerHTML = seconds + "";
timer = seconds;
}
else {

}

}, 1000);
</script>
<style>
.redirect-page{max-width:1400px;margin-top:50px;margin-bottom:50px;margin-left:auto;margin-right:auto;text-ailgn:center;text-align: center;}
#redirect-get{margin: 7px;background: #00cc00; border: 1px solid #00cc00; color: #fff; cursor: pointer; font-size: 13px ; font-weight: bold ; padding: 7px 15px;text-decoration: none;text-transform: uppercase;text-shadow: none;}
#redirect-close{background: #ff4444; border: 1px solid #ff4444; color: #fff; cursor: pointer; font-size: 13px ; font-weight: bold ; margin-bottom: 10px;padding: 7px 15px;text-decoration: none;text-transform: uppercase;text-shadow: none;}
#redirect-get:hover, #redirect-close:hover{background: #555; border: 1px solid #555}
.redirect-timer{color:#ff3333;font-size:50px;margin-top: 30px;}
</style>
<?php get_footer(); ?>
Bước 2: Tạo trang Redirect trong quản trị wordpress
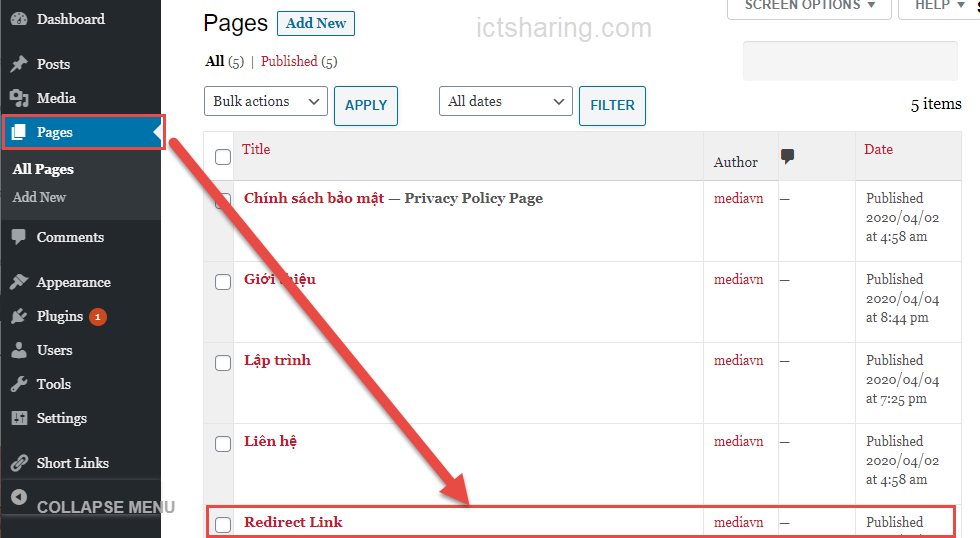
Vào trang quản trị wordpress > Trang (Pages) > Tạo trang mới (Add New)
Trong đó:
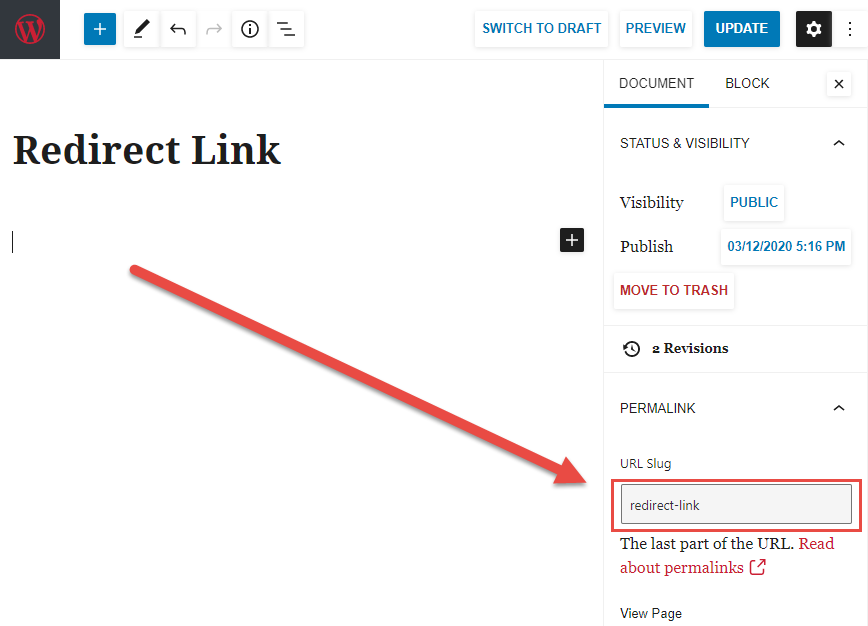
- Tiêu đề: Redirect Link (đặt tùy ý)
- Phần Url Slug: redirect-link
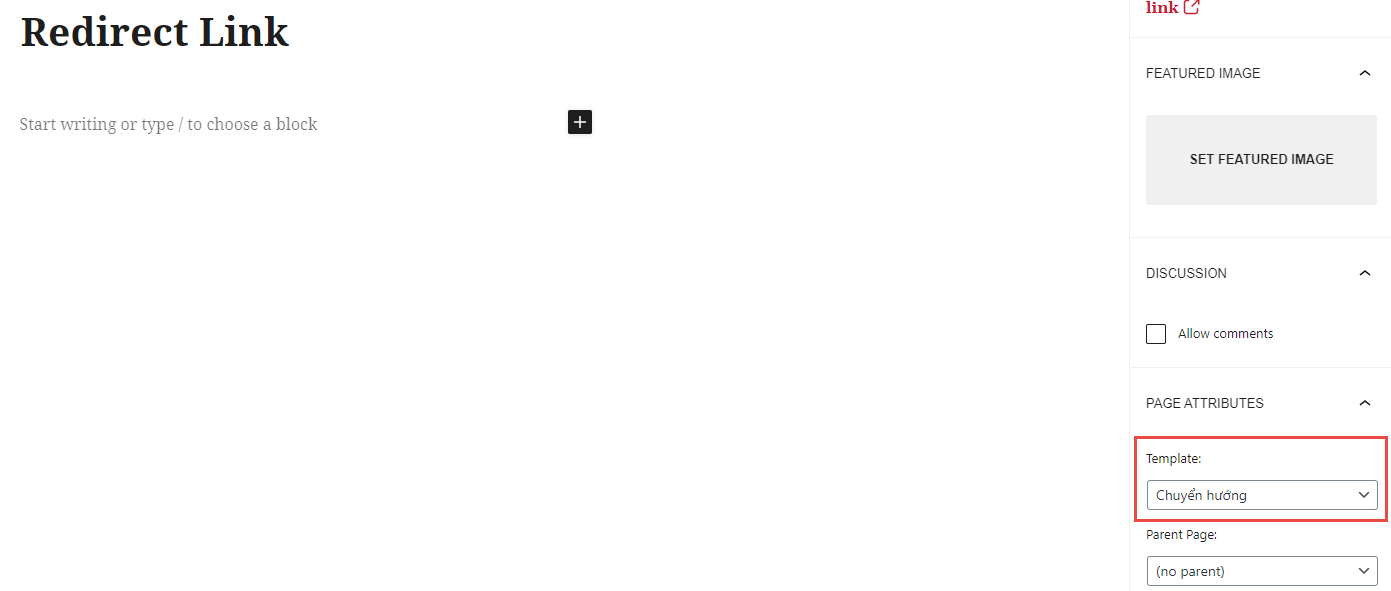
- Phần thuộc tính trang – Mẫu: chọn Theme Chuyển hướng
Sau đó chọn Cập nhật (Update) để xuất bản trang vừa tạo.
Bước 3: Hướng dẫn sử dụng chèn link chuyển hướng
Sau khi thực hiện bước 1 và 2 xong, mỗi khi viết bài viết muốn chuyển hướng link download về trang vừa tạo chúng ta làm như sau:
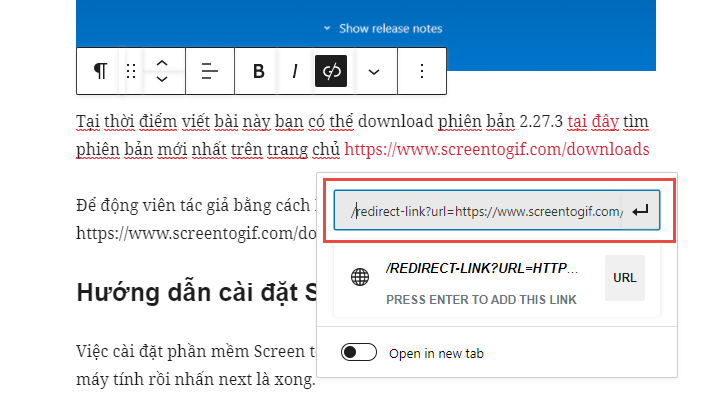
Phần chèn link download thay vì chèn link thông thường là: https://www.screentogif.com/downloads
chèn thêm đoạn:
../redirect-link?url=https://www.screentogif.com/downloads
Ví dụ:
https://ictsharing.com/redirect-link?url=https://www.screentogif.com/downloads
Sau đó ra bài viết xem kết quả.
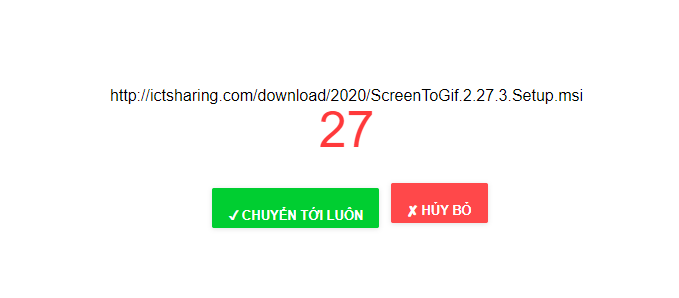
Bạn có thể chỉnh sửa trang page-redirect-link.php để nhúng quảng cáo vào cho phù hợp với ý tưởng của bạn.
Kết luận
Cách tạo trang chuyển hướng link trong wordpress này về cơ bản rất đơn giản. Tuy nhiên, nó sẽ bất tiện mỗi lần nhúng link phải thêm đoạn /redirect-link?url= thì mới thực hiện được. Nhưng đây cũng là cách hay để bạn tham khảo thêm.
Nếu có bất kỳ câu hỏi gì? hãy comment phía dưới hoặc tham gia vào cộng động của chúng tôi tại https://www.facebook.com/groups/190666571637007
best suited article
Có cách nào chỉnh sửa trang Redirect bằng Elementor không bạn !
Mình không sử dụng Elementor, chắc vẫn giống nhau thôi bạn ạ. Mình chia sẻ cách này để đơn giản nhất có thể, tối ưu code, tối ưu hiệu suất load trang.
Cho mình hỏi nhúng ads dưới đoạn code nào ạ. Do mình không rành lắm.
Bạn có thể đặt mọi vị trí đều được, miễn sao đúng chuẩn HTML bạn nhé/
bài viết rất hữu ích tks ad